Sunday, August 18, 2013

Busy Canning Day

Sunday was a busy day...
 
Canned seven quarts of sauerkraut that was nicely fermented.

 
Also had a pot of small red plums I'd cooked down into sauce earlier in the week...


Which canned up into 6 quarts.  Will work nicely in my morning smoothies this winter!


Green beans were going gang-busters and we did up 19 pints.


The larder is beginning to look pretty good!


Saturday, July 20, 2013

Cabbages & Sauerkraut

Today was a day for making sauerkraut...  it started in the garden with cabbages ready to harvest. We had picked the first head last week, the largest out there, weighing in at nearly 8 pounds.  
 

This was the largest one out there today:
 
 Here they are, ready for trimming up.

That really big one?  Sheesh, that's as heavy as a large newborn!

 Trimming off the outer leaves and the odd bugs that think the vegetables are pretty cool...
 
 Jake has this really great cabbage shredder that came from his grandparents.


Adding 3 tablespoons of salt for every 5 pounds of cabbage and mashing it down so the juices start to release: 

We put 15 pounds of shredded product and salt into this fermenting crock we picked up at Territorial Seed Co. in Cottage Grove when we were heading back from Portland the other weekend.


The last 10 pounds of cabbage went into this 2-gallon jar with the salt. Look how juicy it got already, there was no water added - just the juices released from the cabbage.

We will check it in a couple of weeks and expect it to be ready for eating and canning.

Saturday, September 8, 2012

Canning Pears


Wow, we're already a week into September; this year is going by quickly!

Pears are ripening. We picked all the fruit off Jake's tree last weekend, placing it between layers of newspaper, filling this washtub. They were still kind of green, but are turning yellow quickly.


The instructions I found for canning pears talked about using ascorbic acid to keep discoloration to a minimum and "hot packing" the jars (hot pears cooked for a few minutes in hot water) followed by filling the jars with a hot syrup. This seems complicated to me. I mean, you've got hot pears in a liquid that you put into a jar. Where is there room for hot syrup I ask? And, is ascorbic acid really necessary??

I called my mom to ask how to can pears. She said to put the peeled, cut up fruit in a bowl of water to deter browning and then cold pack the hot jars (draining the water off), then filling up with syrup. Yes! I knew it could be simpler!

Here is a canner full of jars, happily boiling away...


After two canner loads, I have 14 quarts of pears.  Not bad for an afternoon's work!


This year I discovered "Tattler" lids for the first time... they are plastic, reusable, flats that seal with a removable rubber ring, but you use a regular jar ring while processing and they come in regular and wide-mouth sizes.


Here is link to them on the Lehman's website Reusable Canning Jar Lids

Sunday, July 15, 2012

Peas Please

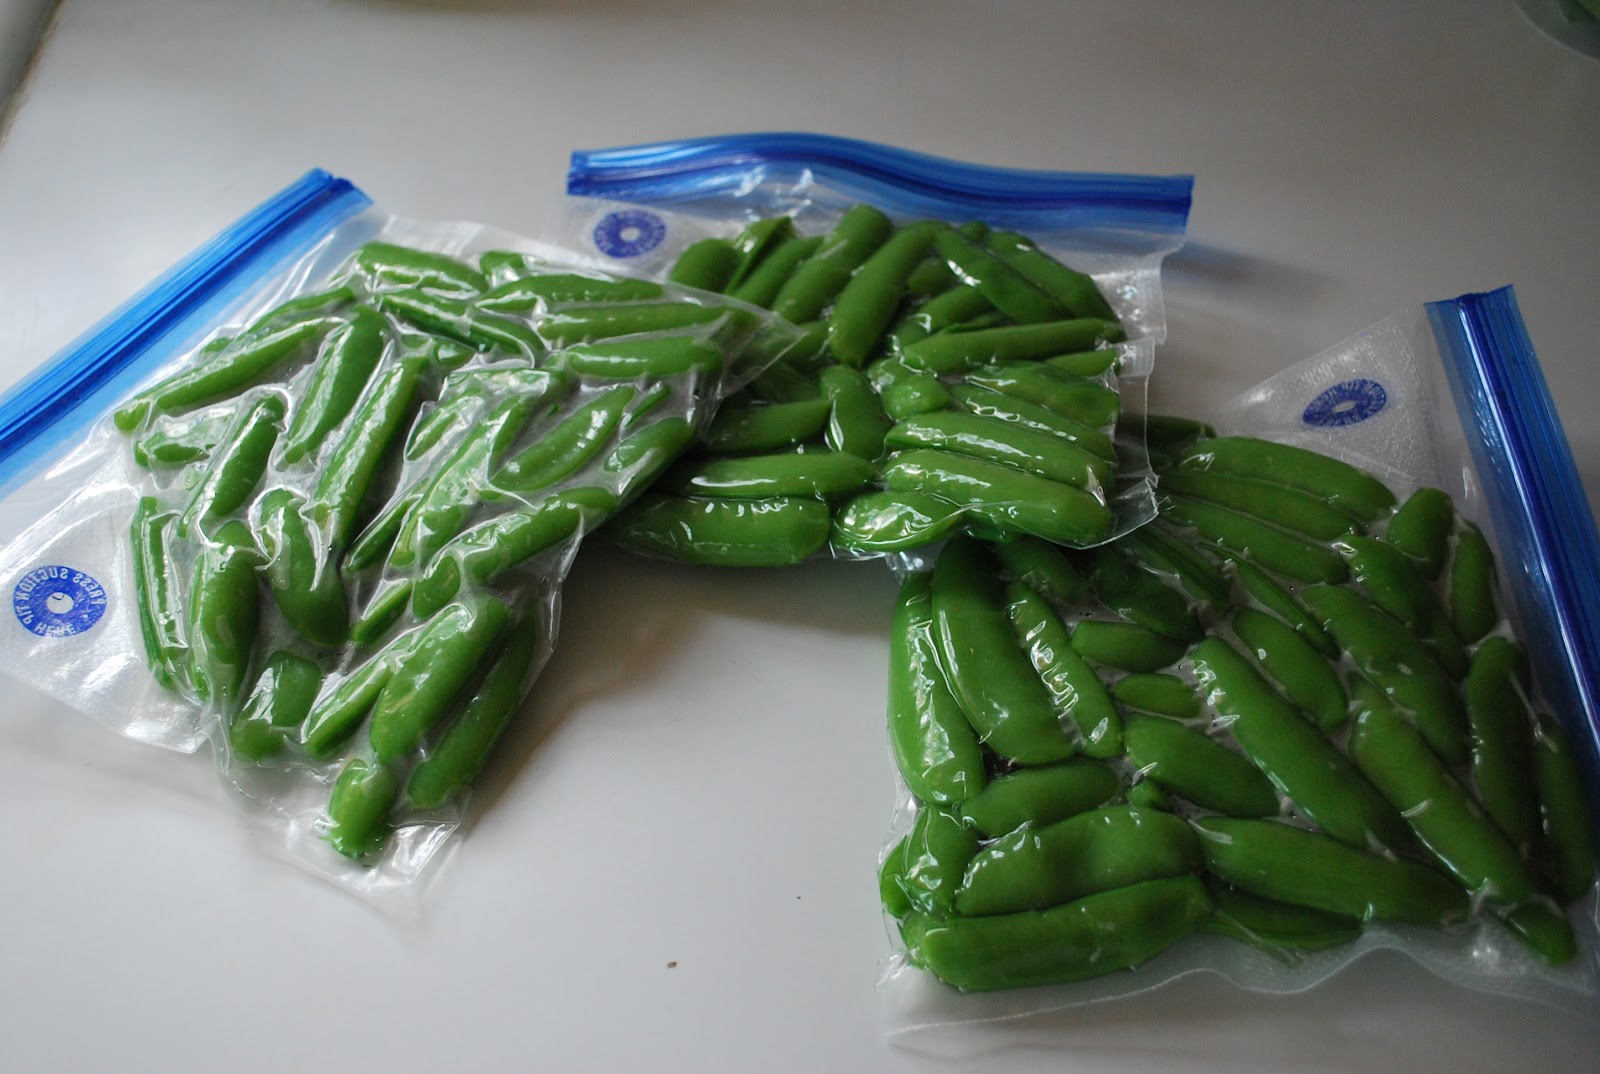
I got my sugar snap peas planted a bit late, but the good thing about that they're still producing.


My row is only about six feet long, but I picked two quarts worth the other night.


Since this was too much to eat fresh, I blanched and froze three bags worth...


This will be nice in stir-fries later!


Tuesday, May 1, 2012

It's Time for Gardening!

After a wet, cold-ish spring, we finally have some warm weather! Okay, warm-ish. 


Here is the view to the west from my deck to the side of the house.


I got some seeds put into the ground weekend before last...

The peas are up! Just poked out of the ground yesterday.


The radishes just came out today...


I love the idea of using wine corks as garden markers. Use a Sharpie to label, then jam it onto the pointy end of a bamboo skewer. 

Now waiting for lettuce and carrots, which were planted the same time as the radishes (a week ago), and the kohlrabi, redbeets, basil, and zucchini I planted on Sunday.

Here are some other garden highlights...

 Asparagus

 Oregano

Rosemary

Mint

The asparugus has been excellent grilled in some aluminum foil with garlic, olive oil, salt, and pepper.

The oregano provided an interesting substitution for cilantro when I made salsa the other day. It was good!  A little Italiany.  Good thing I like Italian.

I haven't actually used fresh rosemary yet this year, but it'll come in handy.

The mint makes an awesome addition to my morning smoothies.

I love gardens and herbs and fresh vegetables!


Does anyone have any good ideas for using rosemary? Leave a comment...


Monday, April 9, 2012

Authenticity

About a year ago, I found myself doing some self exploration to help guide the next steps of my life. Along the way, I made a "mind map." Here is a look at a website like the one I used for guidance:  http://litemind.com/what-is-mind-mapping/.  I made heavy use of clipart and photos I found on the web as well as words I found meaningful. 


One of my favorite words was "authenticity." And since then, I have been thinking about what that really means.  Tonight I came up with this:  Authenticity is when your actions match up with your values.

Like, duh, right?

So... my goal is to spend time doing things that express what I value.

I believe this assists with mental peace...  So, I'm counting on it!

Monday, February 6, 2012

Homemade Laundry Detergent

I've been getting into do-it-yourself projects lately... okay, some of these ideas have been brewing for a while (it looks like I printed these directions for laundry detergent in 2008...) and am now implementing a few things here and there.

Tonight it was time for "DIY Laundry Soap". The source of the directions come from the Sew Green blog.


The ingredients were easy: a bar of pure soap, washing soda, and a bucket.  I picked up the washing soda a few weeks ago at Fred Meyer in the cleaning supplies section. I should have looked for Ivory soap or something else really plain, but I didn't think of it all the times I'm in Freddies or anywhere else, like Bi Mart, and since I was thinking about it today while at Grocery Outlet, I ended up with Dial because they didn't have Ivory. Or anything else without a rather strong smell. That I'm not sure I like. Oh well... I'll give it a try. 

So you grate the bar of soap into a saucepan and cover with water to heat up and melt (stirring periodically). Pour the resulting sludge into the empty bucket and add a cup of washing soda.  Add hot water and stir up, adding more hot water until the bucket is full.

Okay, so the directions left out some information, such as, How big a bucket??  Since I've had these directions for four years or so, I decided at some point that a bucket such as those used for a gallon of coconut oil would be perfect! And since I use a proliferate amount of coconut oil, buying it by the gallon turned out to not be a problem for me. 

Here is a picture of my full bucket: 


And here is the full bucket sitting on top of the dryer, next to the box of powdered laundry detergent I've been using.


Since Jake tells me powdered detergent is not a good idea for wash machines or dish washers when one is on a septic system, I thought it would be a good idea to make a shift. Now if only I can find a DIY dishwasher detergent...

Friday, January 6, 2012

Canning Applesauce

I got a hold of a big paper sack half full of Rhode Island Greening apples that came from a private farm on Sauvie Island up near Portland. If I had looked up this apple variety before tonight, my plans might have changed...  turns out they keep really well into the winter and don't cook up as soft as some.


Instead, I washed and quartered them up, and put them in a stock pot tonight to cook. My canning reference for applesauce said to add a cup of water to the pot to prevent scorching. Ha! Not nearly enough...

Rhode Island Greenings make a nice sturdy cooking apple for pies and such as they keep their shape when cooked. No matter, once they began to soften, I used the potato masher to help things along.  :)


Next they went into the food mill (thank you Sylvia, for passing it on when you no longer needed it!) to be pressed. This ended up taking me more than an hour - those apples really were resisting being squished.


The sauce was really thick... too thick actually. I thinned it down with some home pressed cider which helped sweeten it as well. A little sugar and a lot of cinnamon went in too.  Okay, so I got eight pints into the canner with one quart left to eat fresh.


Okay so it'll be 11:00 before I get to bed... but hey! I didn't get to do any canning in 2011; who knew I'd have the opportunity in January!?

Aren't they lovely?


And... they all sealed!


Thursday, December 29, 2011

Felted Clogs

I can't remember exactly when I first became aware of hand-knit felted clogs, but it may have been from reading the Yarn Harlot's blog. I do remember being very impressed with them. Eventually I obtained the pattern (available here) and knitted a pair for my mother.

It was quite surprising to see how large they start out:


And... how small they end up:


The first picture is the unfelted clogs next to my foot. Although I could get the felted slipper on my foot, my mother's feet are smaller than mine so you can see that they shrunk down quite a lot. Prior to felting, they reminded me of my brother-in-law's slippers that fit on over his work boots so he can walk through the house without having to take his boots off. They just end up dirty on the insides.

On Monday I realized, " Oh! It's after Christmas now, I really ought to be thinking about my sister's birthday next week," so I cast on to make a pair for her. Don't tell her though, it's a surprise.

Luckily they knit up pretty quickly.

Wednesday, October 19, 2011

Pressing Apples


Sunday, Yvonne and I got together with her apples at Jake's house to do a pressing for cider. 


Here's Jake running the press he built. Isn't he amazing??


 We had our snacks...


And Yvonne was happy!  Well okay, we were ALL happy.  :)


And we got seven gallons of sweet cider!  Four are now in the process of hardening...


Here is a link to Yvonne's blog entry from our cider pressing day last year:  Apple Cider Mm Mm Mm
It goes into greater detail and photos of the process...


And... a link to her post about this year's event:  Year two annual apple juice pressing


Tuesday, June 21, 2011

Quilting Again

So I pulled out an old project tonight that I had started about four or five years ago and stopped. The pattern is called "Evening Celestials" out of the book Batik Beauties by Laurie J. Shifren. (The pattern I used is on the front cover of the book...)

I recall the reason I had set it aside: I seem to have developed an inability to follow directions and thus do things in a simple manner. Therefore, rather than cutting patches the way the book said to do, I had decided it would make more sense, for example, to cut a square instead of the two triangles that get sewn together into a square. In order to do this, I had to draw out the pattern on graph paper and figure out the patches manually. This was all well and good until I came to the "set in" seams.  Aargh!

Yes, there are patches that extend into the next area, i.e. the squares overlapping the inner border. This means that one may not sew a straight seam, but rather, sew one edge at a time up to 1/4 inch from the end of that seam, stop, shift the fabric, and sew the next one, and when the third one is done, one hopes they all lie nice and flat and even. These were not lying all nice and flat and even. I was pretty sure I would have to rip out the offending patches, and do those over again, the way the directions said to do it in the first place. This, I was dreading, hence the 4-1/2 year delay.

So... out comes the unfinished quilt top. Looking at the offending pieces... Heyyyyy... These aren't all buckled up after all... what in the world...? Once I ironed them down, I decided any offending puckers could be "quilted out". That is, once the quilting itself is done, any weird puckers will be forced into submission. What exactly was it I was worried about!?  Clearly not much.

On with the outer border. Uh, there are triangles set into these borders too. And they want me to cut the border pieces several inches longer than necessary, cut the edges at a 45 degree angle, sew the triangle into the top part and cut off the excess?? Are they nuts?

I can't bring myself to "waste" fabric like this! Okay, I know. I'll cut them straight, then sew in the triangles, then seam up that bottom bit and voila! It'll all be good!

Uh oh. I didn't realize these cut triangles would be quite so tricky... Again, I have dodgy seams that don't lie flat and they have all these weird puckers. Aargh!

Rip out the seam. Try again. Rip it out again, reassess. Why is this so hard!? And why the heck can't I just follow the directions to begin with??

Okay... got it! And, get this - I was able to figure it out MY way.  :)

So here is the quilt top before the outer border is mitered. So, just have to miter the corners, and quilt it, and then I'll have a dandy wall hanging. I think it'll look good hanging in my office at work.

And here she thought she didn't even like quilting anymore... HA!